Wednesday, October 31, 2018

October Kit Roundup!

October is one of my favorite months because it's full of my favorite things! Football, Fall colors, Pumpkins, Squash, Apple Cider and gooey treats, mornings on my porch waking up to the crisp weather, and, of course Halloween! October has also been JAM PACKED with new layouts! Before we turn the calendar to the great month of November, let's take a look back at the page kits that joined us in October.

For anyone with their butts in the bleachers on Friday nights cheering the local team, Playing Under the Lights is perfect to capture your team spirit!

Family Fall was a HUGE hit! Its gorgeous, rich colors and the cute pumpkins make this layout perfect for your family photos!
I mean, who doesn't love candy and this bright and fun layout!? I love it so much, I used expanded the layout and added some super fun pattern paper flags in these bright colors. You can find the I Love Candy project and tutorial here.
You'll definitely find me cheering on my favorite football team (GO BADGERS!), but you're nuts if you think I'm missing the BEST part of half time! Let's Make Some Noise celebrates our marching band stars!
I just love our Spooky Spiders page kit. Look at these adorable little creatures! And that title is awesome!
Halloween Party is bright at fun and ready for your costume photos!

This one makes me SO happy. I just want to curl up in a blanket with a good book and a hot cup of tea. Cozy Fall Days is great for those slow, beautiful Fall mornings. 


This might be one of my favorite Halloween kits. Spooky Halloween House is the quintessential Halloween scene, but I just love those spooky eyes peeking out of the house!

Our final kit for October and the Halloween season is Happy Halloween Monsters - SO great photos of your little monsters!

We hope you have a safe and fun Halloween! See you in November!


Thursday, October 18, 2018

5 Minute Candy Corn Halloween Decoration

This Fall got away from me. We've been in full-on Fall and Halloween mode at DML, but you wouldn't know it if you looked at my house. Fall brings a host of changes in our family. My husband is a High School Football Referee, so he's MIA until mid-November or beyond - depending on playoff season. So I'm a man down, and I'm still struggling to figure out schedules and get places on time now that Nolan is in 4K. Man, I did not realize how much school takes over your life - even when you're not the one in it! So needless to say, we're two weeks out from Halloween, and all I've managed to do is put some gel clings on the window that I found in the dollar section at Target. And the only ones still up there are the ones we put high enough so our cat couldn't snag and eat them...

It's not the end of the world, I know. Halloween and Fall will be enjoyed whether my decorations match the festivity in my heart. But it's in my bones to make things fun and to create a magical world for my little guy - that magic goes away quickly if you don't feed it, so I remembered a simple candy corn banner I had seen that takes - literally - less than five minutes to assemble and put up, and I got to work. 

In case you're suffering from "It's all coming too fast!" syndrome like I am, here's a quick how-to that might help you get your mojo back. 

Isn't it the cutest?!? I added a few sparkly spiders and voila! Instant Halloween. 

Candy Corn Halloween Banner

First, you'll need to cut your cardstock into 3 sized of circles. You can determine your sizes, but the yellow circle should be the largest, orange should be a medium sized circle, and white should be the smallest. My circles were 4" in diameter (yellow), 3" in diameter (orange), and 2" in diameter (white). Once they are cut, glue them - one circle inside the other as shown below: 


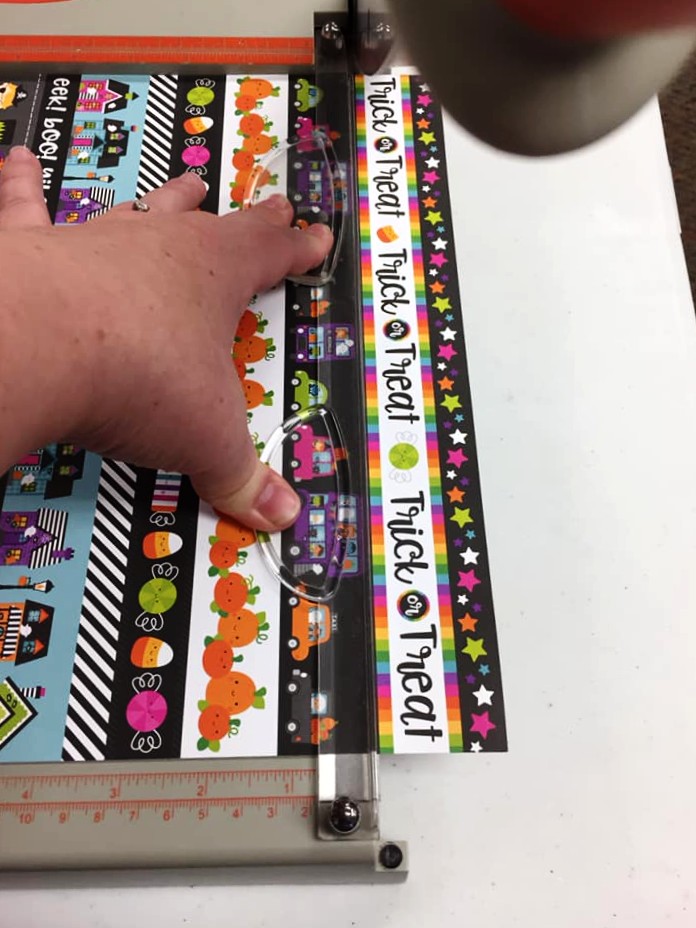
Once your circles have been glued, cut them in half. I used a simple scissors. You could cut them by hand with a scissors or use a paper cutter.


After they have been halved, cut each half in to thirds. I eyeballed the first cut - starting at what looked like the center of the white half and cutting outward to a point on the yellow circle that seemed 1/3 of the way in. I then made my second cut, starting in the center of of the point made by my first cut and cutting out through the orange and yellow sections to create a total of 3 similar pieces from each half circle. 

Cut each half circle into thirds until you have a pile of paper candy corn. 

Next, using a hole punch, put two holes in the yellow section of the triangles. You'll be threading your string through these.


Once all the holes are punched, thread your string through until all the candy corn is on your string. I used black and white striped bakers twine, but any string that will fit through the holes will work. 

I spread out my candy corn to have about a half inch of space between each of them and then hung them up! Easy peasy! Give it a try - and get creative! You could swap traditional colors for something even more unique to you! Happy Crafting!


Happy Halloween!!


Monday, October 8, 2018

Simple Pattern Paper Flags and Kit Expansion

It's a favorite challenge of mine to take our page kits, add some creativity, and make them my own. I could not wait to get my hands on I Love Candy. I love the bright, fun colors and I thought the possibilities were endless. Normally, I change one major item on each kit or focus on one design element, but this time, I decided to work in a few fun things. Before I show you the changes, let's look at this adorable kit!

I Love Candy in it's original, adorable form.

And here are the changes:
I Love Candy after the revamp! Who knew you could get EVEN MORE COLOR in here?!?

There's a lot going on here, so I'll break down the changes. I'm going to start with the addition of the adorable pattern paper and this great flag creation that was inspired by a process video by Marisa from the myscrappiness Youtube Channel. You can see these flags on the outer two pages of this kit expansion. It looks like carefully lined up strips of paper, but it's so much easier than that! Check out how I did it below: 

I mean, come on! Isn't it the CUTEST!
I have looked at this pattern paper so many times over the last year just hoping to come up with a way to use it. It's so bright and fun and adorable. I LOVE pattern paper like this. I just never know what to do with it except cut it into strips and try to piece them into the layout somehow. But sometimes, I get tired of doing the same thing over and over. But this simple trick uses this paper in such a cool way.

I knew I wanted to use most of this paper in the flag pieces because it's so darn cute all stacked up, but I love the look of the Trick or Treat line on top and I didn't want to cut it up, so I decided to lop that off and use that separately, which you can see below.

Lining it up on the paper trimmer

Once I cut the Trick or Treat strip off, I decided to cut the stars off, too and use them separately. And I still had plenty of cardstock to do my project.


I was playing around with options here, but I knew I had made the right choice when I laid this out. What a cute little strip!
 Let's take another quick look at our desired end result. You can see the full effect on the right side of this completed page.

The very first step is to decide how wide you'd like your flags to be. You'll be cutting into the sides of the paper, so the furthest point out will be the length of your first cut, and the inmost cut piece will be about 1 1/2" in from the edge. In order to make it simple and to use as much of this cute paper as possible, I decided to cut it directly down the middle so I had two pieces that were 6" wide.

Cut your paper to your desired width. I cut mine straight down the middle to have two 6" halves.

The Two halves side by side.


 You'll notice that you cut some items in half - like this bus, pumpkin, and candy corn. Since I knew I'd be cutting into the paper to create the flags anyway, I chose to use these already-cut-in-half sides as the flag sides so I could keep the ends intact.
 Once you've decided which side you want your flags to be on, you'll need to flip your paper over to mark your lines. On the edge you want to cut into, mark a straight line one inch in from the edge. I used a ruler and made a mark at one inch at the top and bottom and then used that ruler to connect the marks in a line.
 Once you have your line drawn, flip your paper over and cut in to that line from the edge - using the strips as your guide. In order not to go over my 1 inch line, I cut small starter cuts from the top side and then flipped it over to continue the cut to the 1 inch line.
Using pattern paper with build in strips of color and patterns makes cutting in a line pretty easy!

Finishing the small cuts to the 1 inch line.
 Once you have finished this, you will have created what look like 1 inch flaps along the side of your cardstock. Next, cut every other flap off using the 1 inch line as a guide. 
Cut off every other flap with your scissors.

When you've cut every other flap out, your remaining cardstock will look like this from the back.

And like this from the front.

I decided I wanted to have my flags face two different directions, so my tabbed pieces looked like this before I cut them into flags.

Next, we will create the flags. For each tab - the outer tabs like the bus line below AND the inner tabs like the pumpkin line below, cut right in the center of the strip and about 1/2" deep from the edge of each strip.
I eyeballed the 1/2" mark and snipped.
 Starting from the corner of the strip and ending at the 1/2" deep cut, use your scissors to cut a triangle out of the end.

By cutting from the corner to the end of the 1/2" deep cut you already made, you'll complete the triangle shape and can remove it.
 Repeat this step, coming from the opposite corner of the strip to the end of the 1/2" deep cut to remove the second triangle and complete the flag.
 Each section or strip will be completed just like this first strip until you get to the end of the rows.
For the inner strips, you'll follow the same steps, cutting in from the edge of the strip and stopping at 1/2" deep.

Then cut from the corner of that strip to the end of the 1/2" deep cut, just like the outer strips.
 Your final result will be this incredibly cute line of flags that you can place in your layout! I just LOVE it!

Let's take a quick look at the results, page by page.

Page 1 - pattern flags and extra photo mats!
 On this first page, I lined up the straight side of the pattern paper on the edge and allowed the flags to point inward toward the other two pages. I filled in the black side with staggered, brightly colored photo mats, and added a few pieces of candy to tie it into the theme a little more clearly. I contemplated putting additional photo mats over the left side of the pattern paper, but it was so darn cute, I just couldn't cover it up. :) 
Page 2 - Title pizzazz and pattern strip
 Because there is so much happening on the other pages of this layout, I decided to keep this relatively simple to anchor the design. I placed the title piece on the top, just turned a little bit to give it a bit of whimsy, and used popup dots to give some dimension. I also added a little bow of black, gingham ribbon to the sucker stick. I'm a "sucker" for little ribbon bows.  I laid that Trick or Treat strip across the bottom and then snuck some extra candy in. I love the simplicity of this page. 
Page 3 - Pattern Paper flags, pattern strip, and extra photo mats.
On the final page, I used the second half of the pattern paper flags and pointed them back at the center, similar to the first page. But instead of lining the straight side with the edge of the background paper, I decided to line it up with some photo mats in a color blocking pattern to try a different design element. I love the bold colors, but to break them up just a little, I used that extra star strip to place a vertical line through them. Add a couple pieces of candy and we're set!

All together now!
I absolutely adore how this turned out. This pattern paper is SO adorable and I'm so glad I finally found a great way to use it. And so simple! With just a 12 x 12 of pattern paper, a small piece of ribbon, and a little extra cardstock, I was able to revamp this layout into something that feels both original and super fun! I hope you give this pattern paper technique a try. You can find I Love Candy here on our website, and, for a limited time, we have this exact pattern paper and additional cardstock available on our website, too! Head on over to our online store and pick up your supplies to try it on your own. And then come back and let us know how it went! Happy Crafting!

Monday, October 1, 2018

Scrapbook Solutions - Color Choices

One of the questions we’re asked most frequently, aside from how we come up with our designs, is how we go about choosing colors. Color choice is super important! It’s amazing what the right blend will do to your layout. It’s always a little challenging to answer that question because I have a unique situation. I have an entire wall of color at my disposal. I can pull 50 colors, rearrange, and change my mind when I want to. It’s pretty incredible!


Down Memory Lane's Wall o' Paper

But I know most people don’t have the luxury of a “Wall-o’-Paper” at their disposal, so what can you do? I’ve got a few simple things you can do that can help with color selections when you’ve just got to make a choice. When you’re standing in the craft aisle, staring at all the options, it’s hard to make decisions. There are so many options! Or maybe you’ve got a huge craft stash and you’ve got to decide which section to go for. This is not the place to start making decisions. It’s too overwhelming. You’ve got to have an idea in mind before you enter the paper aisle.

Here are 4 ways you can develop your skills and learn to create beautiful color combinations: 


1. Become a student. Learn from those around you who’ve got it down. Some people are just naturally good at color selection, but most of us – even those of us who design for a living – aren’t born with this gift. It’s a skill that’s learned, worked on, and sharpened. Who in your life has a good eye? Do you have a friend or fellow scrapbooker you could ask to help out? Invite her over to go through your stash with you and help you organize your paper into color groups. Pay her in chocolate, coffee, and good tunes. 😊 Or maybe she can hit the stores with you next time and help you narrow down your choices – I mean, how many different shades of green could there be?!? Just kidding, we totally need all of them. 😊 Make it a girls’ day. She’ll be glad to share her skills and you’ll get some valuable input!

If you don’t have a color-savvy friend in your life, learn from your favorite designers and companies! When you see a color combination you like, note the choices the designer made. And not just the big choices! Notice the smaller accent colors and the scale and proportion. Get some of our kits in your hands and really examine them. Take those favorite color combinations and match them with colors in your stash for future layouts. Here are a few of my favorite kits. 


All Bundled Up is one of my favorite winter color combos. It has some traditional elements, but the bright colors make me so happy!

For the Love of Scrapping is, of course, a big fan favorite. It's one of my favorites because of the fun color combination. Bright and grounded at the same time.

Family is Forever Navy is a personal favorite. These colors make me feel warm.

Grandparents has another classic color combination that works for so many different themes. This one is anchored in brown, so it gives another great option.

Their color combinations are beautiful and interesting to me, so I pulled the colors and I love to try to work them into new designs. Below, I've pulled out the color combinations from each of these kits so you can see them more clearly. When you see them like this, it's easier to see what other layouts you might work them into. The possibilities are endless!


At first glance, you wouldn't necessarily think "winter" with these colors, but they work! I'd also use this color combination for a number of other themes: birthday, school, celebrations.


I adore this color combo. Mostly because it's not something I would have pulled on my own. If I was looking at our whole Wall o' Paper, it's highly unlikely these would have ended up in my pile together. But look how GORGEOUS they are together!


These colors are right in my wheelhouse - deep blues and reds are my happy place - but I don't think I would have considered mixing in pink and olive green into the mix. All together, they create this beautiful little harmony.


I appreciate this combination because of the deep browns mixed into the color. This shows how some brighter colors can be placed together in the right sizes to create something beautiful. 
One other thing you'll notice is that we often take our color cues from the pattern paper that inspires us. In Family is Forever - Navy and Grandparents, the main colors come directly from the blends in the paper. 

Learn from designers! Follow us on Instagram and look at designs, but also look at photo composition. Watch some Ted Talks on design. Take an online art or design class. One of my favorite Ted Talks - one that revolutionized my views on color - is Beau Lotto's talk on Color Theory. You can find it here. It's a rule in my book to never count a color out. You can often take one color and, depending on what colors you surround it with, it can change it's look and feel. This talk explains why this happens and will show you some pretty incredible color tricks! A couple great starter online color classes are Color Art Theory and Color theory.


2. PLAY! Make some crazy choices just because it feels right. Don’t get pigeon-holed by ordinary or expected. We’re in the beginnings of the Fall season right now. It’s really easy to get stuck in the mindset of mustard yellows, pumpkin oranges, chocolatey browns, and rusty reds. 
They're tried and true Fall colors for a reason, but how can we make them pop?

Obviously, that’s a tried and true color combination – and you’re mirroring nature – but consider splashing an unconventional color in there. Try a navy blue or a deep purple. Splash in some light pink or light green.  Sometimes a color may seem too bold, but at the right size, it becomes a beautiful pop of color.


It's not a HUGE change, but if you work a little navy blue in there, it gives these Fall colors a depth it would not have without it.

Working a little pink into the mix gives it a lighter feel.

3. Hit up Pinterest – but not where you’d think. When I look for inspiration on Pinterest, I generally avoid using “scrapbook” as a search term. There’s a whole world out there full of design! I love to search for home décor and art. Artist and decorators are – of course – masters at color and scale, so I learn a lot from them. I often search for “wall art” or “home décor” and the topic I’m looking for and it’s a wealth of inspiration!

One of my favorite Pinterest searches is “color palettes”. It’s a fantastic resource. It pulls what looks like a paint sample from real photos and you can use that to find color combinations you may not have thought to put together. I also like to use these to choose shades. It’s one thing to say “put green, pink, and gray together” but if the shades are off, it would look garish. I love to use these to find a combo and then literally match my cardstock to them. 

Here's a few that I used to find a unique color combination with our cardstock.
I LOVE purples, but I usually gravitate to yellows, pinks, and tans when I work with them I loved the idea of this simple combination of purples and oranges.

Here's my selection using the color palette as a guide.
This palette invokes so many feelings for me. It's calming, beautiful, and beautifully mixes these cool colors together.

Here's my color selection using this palette as a guide. I love it SO much and I would not have pulled these colors to work together on my own.
I didn't pull colors for these, but I really love these color combinations. Pinterest is FILLED with gorgeous color palettes. Be sure to check them out!
I love this combo for alternative masculine layouts.
This combination gives me all the vacation vibes. 

I LOVE a feminine palette, but I get a little bored of pink. This gives me lots of ideas! 
Another feminine option. It's got pink, for sure, but those other colors can really balance it out!


These bold colors are fantastic!

This combination is classic and can work for masculine layouts, too.


4. My last suggestion is a little unconventional, but it’s changed my view of color completely. Download some color-by-number apps (Happy Color is the name of my favorite one). Color by number is one of my favorite things to do when I need something mindless or to wind down my day. I do it for fun. But shortly after I downloaded my now-favorite app, I realized that I was learning a ton about color mixing. There were colors I would have never thought to put together - combinations that seemed insane, but when you zoomed out and looked at the whole picture, it was gorgeous! I found myself taking a few more risks with color based on my increasing comfort with these color choices. I thought it was just a fun, free app, but I got a lot more out of it. You never know what you’ll find if you look! 


These are just a few of my favorite color tricks. I hope you’ve found one – or all of them – helpful! I’d love to hear your color tips or hear what you thought when you tried one of these tips. We always love to hear from you! Happy Scrapping! ~Chalsea