Showing posts with label How-to. Show all posts

Thursday, March 14, 2019

$5 Color Packs!

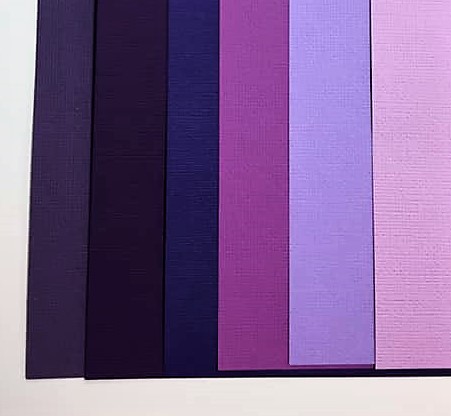
We've got some exciting news! We've had so many requests for cardstock that we have decided to offer new Color Packs for purchase on our website! So what is a Color Pack? Great question. 😉 Our Color Packs are packs of cardstock that are multiple shades (SIX to be exact) of the color you choose. For example, our Red pack has 6 different shades of red for you to use on your projects! Each color pack includes two full 12 x 12 sheets of each of the 6 colors, giving you 12 full sheets of cardstock for just $5!! Pretty fantastic! And with 10 different Color Pack color options, we've definitely got you covered for all of your crafty needs.

Aqua Color Pack

Blue Color Pack

Candy Pink Color Pack

Green Color Pack

Neutral Color Pack

Orange Color Pack

Party Pink Color Pack

Purple Color Pack

Red Color Pack

Yellow Color Pack


This week, we debuted them on our Facebook page and website, and they're flying off the shelves! Chalsea also took our Candy Pink Color Pack and made a video tutorial to show simple ways to use the pack to transform our page kits. Check out the amazing transformation!


The possibilities are really endless and, for $5, how can you go wrong?! So pick yours up today while they're in stock!

Tuesday, January 22, 2019

13 Ways to Personalize your Page Kit. #9: Color Swap

Since we turn THIRTEEN this year, we're releasing 13 new kits this month and for each kit we release, I'm blogging about another way to take that page kit and make it your own. We've shown the versatility in our page kits with our first 8 releases and their revamps. They are great on their own for the scrapper who is in a time crunch, or they are a great starter kit for those who want to use their creativity to take them to the next level. We've explored  embellishmentsinkingpop up dotsexpansionsewing, journaling, pop out photos, and secret flip up space as ways to make these kits your own. 

We've got yet another way to revamp your page kits this time AND we're using one of our birthday month weekly specials to do it! This week only (January 19-25, 2019), we're introducing Color Bundles in our online shop. These $5 packs include cardstock, patterned paper, bakers twine, and sequin embellishments in matching shades of the color you desire. They make it easy to make your layouts match your team colors, your party colors, or even just your favorite colors! I'll show you how we did that with our newest page kit, Cheer.

Personalization Option #9: Color Swap


Original Layout: Cheer Blue

Original Layout: Cheer Red
Our new Cheer page kit comes in two color options, Blue or Red. It's difficult to do sports pages that work for every team - there are just so many different color combinations - so when we do use team colors, we often try to use the most common school and team colors. But we know that doesn't work for everyone. So what can you do? That's where our new Color Bundles come in! Find the colors you desire and swap them into the kit to make it work for you.

Here's a look at what you get in our Color Bundles (and they're available this week for just $5!): 


Just choose your desired color - for teams, for weddings, to match family portraits - and swap them into your layout!

My family lives in the small town of Osseo, Wisconsin - home of the Osseo Thunder. Our colors are orange and black, so I thought this would be a great opportunity to show how simple it is to take this layout and make it work for the Mighty Mighty Thunder!

First, I took the brightest orange color from the Orange Color Bundle and a bit of Black cardstock from my stash. I also started with Cheer Red because I knew I could use the white pieces included in my layout. 
I chose Cheer Red because I can use some of the white pieces in my layout, too.

Orange Cardstock from the Orange Color Bundle, and Black Cardstock from my stash
After I gathered my paper, I took note of the photo mats and strips that I was removing and cut replacement strips and mats from my cardstock. You can see that the layout has white photo mats and white strips along the sides. I could have kept all of those from the original layout, but I decided that, since our colors are orange and black, I wanted to replace the white strips with black to make it more like my school. I did keep the white photo mats, though. It broke up the color a little bit. 
The red, white, and gray will be set aside and replaced by my orange and black.
After taking care of the large pieces of cardstock, I took stock of the die cuts. I decided that most of the die cuts could just be transferred to my layout because they were dark grey and white. I definitely needed to change the red megaphone and the pom poms, so I pulled them off of the layout and got to work.

I started with the megaphone. I decided I wanted it to be orange, so I pulled out some orange cardstock, and the die cut and began to trace. 
In order to avoid pencil marks, I flipped both the cardstock and the die cut over to have the smooth side up, so I could trace without worry.

Trace the die cut carefully

Fully Traced
Once my die cut was traced, I cut it out with scissors.

Megaphone cut out

Original megaphone with new, orange megaphone
Once that was completed, I traced and cut out the other die cuts that I wanted to change. 

Tracing the pom pom

Original pom and new orange pom

With all of the red pieces replaced with orange or black, I'm ready to assemble my page kit! I also decided to swap the background color to a light kraft paper to look more like a basketball court. So here's the final product!


Color Updated Left Page 
Color Updated Right Page


Color Updated Layout - Perfect for my orange and black Osseo Thunder!
You can see how some simple color swaps remade this page kit to match perfectly with my orange and black team! And I still have the majority of the color bundle left to swap other projects and make them work for me! This is such a simple thing to do with any page kit to make it work for you. You get all the basics and the design done for you and you can just swap in a few colors here and there to make it work for you. Such a great option! So check out those Color Bundles, available this week on our website for just $5 and stay tuned for more revamps throughout the rest of the month!

Friday, January 11, 2019

13 Ways to Personalize your Page Kit. #5: Sewing

It's time for installment #5 of 13 Ways to Personalize your Page Kit! If you've missed our first four, you can find them here (123, 4). If you're just joining us you might be wondering why 13? Down Memory Lane turns 13 this year and we're finding lots of ways to celebrate. Along with weekly and monthly deals throughout the month of January (check them out on our Facebook page!), we're releasing 13 brand new page kits and doing a blog series on 13 ways to personalize them - 1 post for each of the years we've been blessed to be a part of your memory keeping.

We've just released our 5th page kit of the month and we're on to the 5th way to personalize our page kits: Sewing. There are many ways to use sewing in your paper crafts. You can use straight stitches as borders for photo mats or the pages themselves, you can stitch around the edges of die cuts to give them an extra pop, or you can use different stitches as a design element in your pages. For this page kit, we decided to use sewing to create a quilted look in one of the page features.

Personalization Option #5: Sewing

When deciding which way to amp up these page kits, I often let the page kit do the talking. That was definitely the case with our newest page kit, Baby it's Cold Outside. There are many ways I could have personalize this - adding gems, adding patterned paper, or adding additional colors - but a design feature in the original seemed perfect for a little sewing.


Baby it's Cold Outside layout
The original layout has this great strip with colored blocks going down that looks like a quilted piece. I thought it would be fun to add some sewing to the piece to make it really look quilted. 

I'll show you how we used our sewing machine to achieve this look, but if you don't have a sewing machine or don't want to pull yours out, there are other ways! You can always hand stitch. It's a lot more time consuming and is more difficult to make uniform and straight, but it can be done! There are also a few tools out there that can help with hand stitching. You can use a stitch spacer, commonly used for leather work, to mark your stitches. Then go over it with your needle and thread. 
You can find this one here
We had our sewing machine handy, so we used a machine. Here's how you can do it.

If you're not individually stitching each piece, you can adhere the die cuts first and then stitch over top. If you are stitching each piece, stitch first and adhere later. It's much easier to get into all of the sections and maneuver the pieces when they are not adhered. 

We decided to stitch along the long side of the piece, so we adhered the die cuts first. One thing to keep in mind is adhesive placement. You don't want adhesive where you will be sewing or it may gum up your needle and machine, so be sure to use glue with that in mind. You don't need much adhesive - the stitches will hold it in place - but it will help keep the paper in place when you run it through the machine.


Glue was placed in the center of the square leaving the sides open for sewing
Once your die cuts are assembled, sew through both layers at the same time. 


You'll want to choose a measurement on your sewing machine to follow with the edge of the cardstock to make sure the stitching is straight. Just like you would while sewing fabric.

After you've completed the sewing, trim off any excess thread and then glue those items to your pages. We always run our adhesive all of the stitching to secure the stitches in place.


If you glue over top of your stitches, they'll be secure.
Here is the sewn strip on the page. Isn't it cute! I love the little pop it adds to the layout!


Sewing is such a simple way to add a little extra to your page kits! It's easy and quick and really punches up your die cuts! We stopped at this quilted strip, but how cute would it be to outline the snow and the snowman? Or the snowflakes? The possibilities are endless, here!


That wraps up our 5th option for personalizing your page kits! We'd love to know how you use sewing in your scrapbooking or how you'd make this page kit your own! Let us know in the comments! And stay tuned for more new page kits and more ways to personalize them!

Tuesday, January 8, 2019

13 Ways to Personalize your Page Kit. #3: Pop Up Dots

Last week we posted our first two ways to personalize your page kits. We glammed up Love, Joy Peace with some gorgeous embellishments (find it here) and we added depth and a bit of a rustic feel to Family Winter (shown here). Since we turn THIRTEEN this year (man, time flies!), we're releasing 13 new kits this month and for each kit we release, I'm blogging about another way to take that page kit and make it your own and it's time for #3 - something I almost use too often (if that's possible). I just love it so much. :)

Personalizing Option #3: Pop Up Dots

Our newly released page kit is Happy Birthday Blue and Gold and it's absolutely perfect for some pop up dots! Here's a quick photo of the final product and then we'll look at how it to do it.
Original Happy Birthday Blue and Gold Page Kit.
I just love this layout. Blue/Gold is one of my favorite color combinations and the look of this layout is so classy. The title on the side is so big and bold and the cake on the other side is super fun. So many of these die cuts are perfect for popping up!

Let's take a look at what I used to create this layout:
All you need to create this layout is the Happy Birthday Blue and Gold page kit, your choice of adhesive (I like the ATG gun and Nuvo clear drying adhesive), and 3D foam squares.
These 3D Foam Squares are from Scrapbook Adhesives by 3L. I used small, .25" x .25" white and black squares. 


This original layout has a lot of opportunities for 3D effects. I often want to use pop up dots when there's something I want to feature, like the Happy Birthday title, when there are items stacked, like the birthday cake, or when there are items layered, like the presents. 

When I'm using pop up dots, I often adhere all of the pieces that I know I wont be popping up, just to get a handle on what my options are. You can see below that I adhered some of the die cuts together and the photo mats. This makes it easier to play with and strategize. Once I had these items decided, I adhered the photo mats so I knew what areas I was working with.


Next, I started with the presents. Because they were originally layered, like they were in front and behind each other, this seemed like a natural place to bring some forward. 

Group of presents with pop up dots. 
It may seem like a little overkill, but I like to space my pop up dots pretty evenly and frequently across the die cut. I don't want too much space in between or to miss areas (like the bow) so it all pops up evenly and doesn't divot over time.

Popped up present

You can see that they give it just a little bit of a 3D effect.


You can see that I layered the tall present behind and popped up the front two presents
I also decided to pop up the title, so you can see the varying heights in this shot.
Here is the left side of the layout with title and select presents popped up.
Now on to the right side. This cake was calling for pop up dots - some with two layers! I decided to elevate each layer - including the photo mats on the bottom. You can see how they pop up from the page in the photo below.

On one layer of the cake, you can see that there are multi-colored tabs. I thought this was a perfect opportunity to try to double-pop up! You can see in the photo below the effect of the second level.

Right side of layout with popped up cake and photo mats.


Here's the completed layout with everything popped up! It's a little difficult to tell how great this looks in a photo, but the 3D effect is so cute! It really makes this birthday layout fun.

Happy Birthday Blue and Gold page kit with pop up dots.


I love using pop up dots. It's a very simple way to bring dimension and personality to your kits. It adds just a extra something to this layout!

Stay tuned for more techniques this week and through the entire month of January. And don't forget to check out all of our birthday deals on our Facebook page!