Friday, July 31, 2015

Stylish Sunnies How-To

I love all things bright and colorful - clothing, shoes, scrapbook paper, home decor, even makeup!  Sometimes it's just fun to play with colors and I think the more colorful, the better.  It just makes me happy! So today I wanted to share a how-to on making some beautiful and colorul knock-off Kate Spade sunglasses. The best part? These glasses are super cheap and pretty darn easy to make.  I don't know about you, but my sunglasses seem to last a season or less, so spending just a couple bucks on a pair of shades sounds like a sweet deal to me!  This tutorial comes to us from the blog over on Blitsy.com.  Feel free to visit the original post by clicking this link.

Photos from Blitsy Blog
Aren't these glasses gorgeous? Yeah, they should be at $150 per pair (retail cost) for the REAL ones! But let's go ahead and make our own using Dollar Store sunnies and a few other craft supplies.  You can see at the end whether or not this inspired-look is a winning value....

Here's what you'll need:
  1. Acrylic Paint (How-to uses dark purple, light purple and white but feel free to mix things up!)
  2. Clear Nail Polish
  3. Paint Brush
  4. Cheap yet Stylish Sunglasses (These are from the Dollar Tree...$1!!!)
  5. Painters Tape (optional - original blogger used washi tape, but found it didn't work great so ended up free handing the stripes)
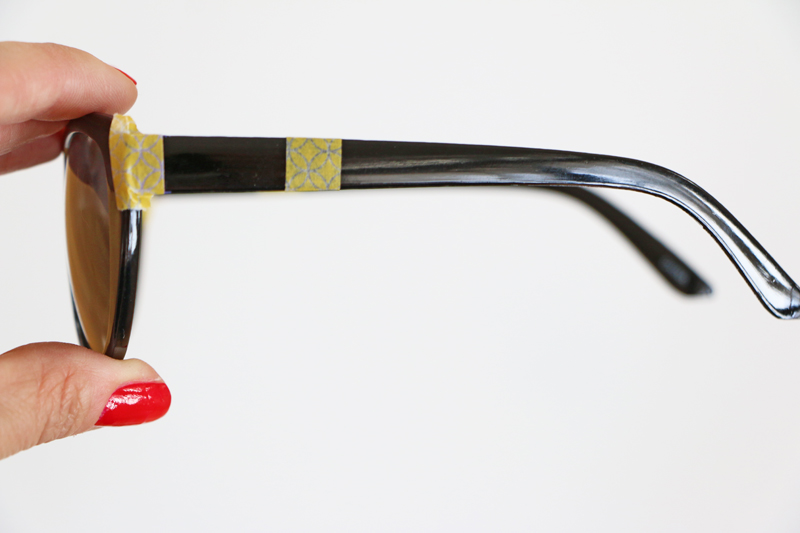
STEP 1 - Clean the sunglasses.  You want a clean and dry surface so that the paint sticks well.

STEP 2 - Pick a side to start with. At the joint where the side meets the front of the glasses, start your first stripe.  You can obviously make the stripes whatever sizes you like, but for this how-to, assume the stripe is approximately 1/4 inch wide. Be sure to paint the top and bottom of the side. You may also wish to paint the inside.  (As noted, you can use painters tape to mark the stripes - this is for those of you who are perfectionists! I'm not sure if the painters tape will pull up the acrylic paint as the washi tape did for the original blogger, so if you're using it, please take care and consider this complication.)

Photo from Blitsy Blog
 STEP 3 - After the first stripe is dry (don't worry, it's acrylic paint so it won't take too long!), you can mark your next stripe with painters tape or eyeball it.  This next stripe will be longer, at about 1 inch wide.  This stripe will be light purple (or your choice if altering). 

Photo from Blitsy Blog

STEP 4 - Leave a little blank space before your next stripe. This next stripe will be about 1/4 inch wide in white.  With the lighter colors (white especially), you may need to apply two coats to get a nice, bright color.  Just be sure to let the paint dry between coats.

Photo from Blitsy Blog

 STEP 5 - Next is a dark purple stripe at about 1 1/4 inches long.  Let dry.

Photo from Blitsy Blog

 STEP 6 - Add a light purple stripe about 1/4 inch wide immediately following.  Let dry.

Photo from Blitsy Blog

STEP 7 - Now you'll leave a longer blank space so that the black of the glasses is visible.  Immediately following, and add a small white stripe.  This stripe is a little smaller than 1/4 inch long.

Photo from Blitsy Blog

 STEP 8 - Next, paint another dark purple one; this one will be about 1 1/8 inches long.  You should still see a bit of the black tip of the glasses showing when done.

Photo from Blitsy Blog

 STEP 9 - Finally, finish up with a small light purple stripe - about 1/8 inches wide.

Photo from Blitsy Blog
STEP 10 - Once all the paint is dry, go back and cover all of it with a coat of clear nail polish. Then, once the first coat of polish dries, add one more coat of polish.  What's this for? To seal in the painted stripes so they're less prone to chipping! Once dry, you can go ahead and complete those same steps on the other side of your sunnies.

Photo from Blitsy Blog
BOOM! In just a short amount of time you've recreated a stylish look for a fraction of the cost.
Go, you!
Photo from Blitsy Blog
Seriously! How totally adorable are these sunglasses? And now if you forget them at the beach you won't be heartbroken 'cause they only cost you a few dollaroos! This would be a super fun project to do with your daughters, sisters, or friends too.  Ladies night, anyone?!

Top Photo Credit - Kate Spade; from Blitsy Blog
EXTRA STEP - Do you love that little embellishment on the side of the REAL Kate Spade glasses?  You can recreate that too! Check out these Design Dimensions - Mixed Metal nail accents.  Just apply to wet polish and then add a top coat over top!  Or mix things up and instead of a shiny top coat, opt for a Matte Finish clear polish to up the design ante even more!

----------------------------------------------------------------

We hope you enjoyed that little Style How-to, but now it's time for the weekly Wrap-up. Here are the newest kits we added to our website.  
Enjoy and order now!  


Thanks for visiting the blog! We'd love to hear from you. Are you enjoying our posts? What else would you like to see? Comment below.  
Thanks a bunch and happy crafting!

Tuesday, July 28, 2015

Color Me Happy!

I am soooo on board with this new trendy pastime....coloring for adults! I loved coloring as a kid so imagine my happiness when I discovered that there are coloring books and printables online designed especially for grown-ups. Yay! Just yesterday on our Facebook page I shared this link to some FREE printables on Blitsy.

Click to download for FREE!
This coloring thing looks like fun, but really? Why would I do this? (I'm sure that's exactly what you're thinking right now...don't worry, keep reading!)  I did a little research online and here's what I found about why you should take up coloring:
  • It's very relaxing and has been shown to calm your mind
  • It's a great stress reliever  
  • Allows for you to sit side-by-side with your child or teen and complete a very low-key activity together.
  • It requires minimal supplies; you might not even have to make a single purchase! Color with anything you have at home - pencils, markers, etc. You can download coloring pages online and print at home or purchase special coloring books for a small cost.
  • Coloring is a great way to express your creativity without complications!
 Here's an awesome site I found for downloading pages to print and color at home - over 700 pages available!  If you're looking to purchase a book, Blitsy sells a variety, many for $10 or less! Check out some of my favorite options - "Happy Campers Coloring Book" and "Zenspirations: Abstract Designs"; trust me, there's many more!  I also found this great article which lists some of the top coloring books for adults and where to get them.  Here's a little sample of some of the designs in the books referenced in that article.

Click here to see the full article.

Many of the designs features elements of Zentangle.  What the heck is that?  As described on their website (Zentangle.com), "The Zentagle Method is an easy-to-learn, relaxing, and fun way to create beautiful images by drawing structured patterns." What's even better is that practicing it can bring you lots of advantages health-wise.  For example, the site lists the following benefits (and more):
  • Relief for insomnia (when done near bedtime) 
  • Improved hand/eye coordination
  • Anger management
  • Diet aide 
  • A way to increase your attention span and improve ability to concentrate
Zentangle recommends the use of Sakura Micron marker pens due to their pigment ink and ultra fine tips.  You can purchase them online from their site, Blitsy, or Scrapbook.com.  Psst....Blitsy even has Zentangle sets including all the writing necessities!  For coloring in the shapes, though, you can choose to use whatever you have on hand.  Any colored pencils or markers will do!  Some people even use gel pens or watercolors.

If you're looking to make an investment into markers that will do double-duty for both coloring and scrapbooking/crafting, I really recommend going all-in on a set. Some great brands include: Zig, Ranger (Tim Holtz), Copic, and American Crafts.  A variety of markers and pens are on sale online  here and here.  Your decision should be based upon what you plan to use the markers for in crafting as the ink will differ.  For example, Copic markers are a little more spendy but are far superior to other markers when it comes to blending and coloring stamped images because they are made with alcohol-based dye ink.  Conversely, American Crafts makes a Slick Writer pen that works absolutely amazingly for writing on slick surfaces like the backs of photos, vellum, glossy paper, and more. These pens use a quick-dry dye ink and wouldn't work at all for blending!   If you want to read a little more about the differences in ink-types, I found this article online and it's pretty helpful! Be sure to email me with any marker-related questions or comment below. I know it can be a tad overwhelming and complicated sometimes!

No matter what coloring medium you choose, I'm sure you'd enjoy this hot hobby! In fact, it seems like this might be just the thing for me. What about you? Are you ready to start coloring again? 

I hope you've enjoyed today's topic. Thanks for visiting and happy crafting!


Friday, July 24, 2015

Flamingo Friday!

Flamingo Friday...what the heck does that mean? Well, it means today I'm sharing some pretty neat-o party decorations and other Flamingo finds that I simply can't live without. :-) I'm not really sure when I decided that flamingos made me happy. Seriously, though, these cute pink birdies are just the thing to put me in a brighter mood!

This first item comes to us from the Dear Lizzy blog by Elizabeth Kartchner.  Click here to view the post in its entirety. You might recognize her name because if you've been a long-time scrapbooker she was a monthly contributer to the "Creating Keepsakes" magazine.  In fact, she even won Scrapbooker of the Year back in 2007.  Her post featured lots of fun pics from her daughter's flamingo-themed party.  How cute?!


Now I want to have my own Flamingo party, don't you?!  Be sure to check out her entire post for all the supplies details!  This next item is currently available on both Blitsy and Scrapbook.com.  This line, called Forever Young by BoBunny, features a variety of fun and funky shapes including donuts, peace signs, and (of course) flamingos!

Cute, right? We featured a couple pages using this line on our Facebook page yesterday so be sure to check that out for inspiration!  Next in line, I want to share a FREEBIE from Oh So Lovely.  In case you are inspired by my flamingo fascination and want to bring a little bit of pink into your life, click this link to get your very own 8x10 printables!   (FOR FREE!)

Finally, here's a little collage of some of my other Flamingo finds! Find the links to get these items below.

  1. How-to: Easy Kids Handprint Flamingo art - instructions from Glued to My Crafts blog
  2. FREE! Flamingo & Polka Dot party garland offered by Chicfetti
  3. This amazing and completely out of my price range Kate Spade bag 
  4. This quote from the Lucky Day blog (P.S. if you visit her blog, you can download this image for use as your phone wallpaper! Sweet!)
  5. An absolutely adorable Flamingo Baby Mobile sold by A Continual Lullaby on Etsy
  6. This beautiful & inspiring 'Rise Above' Gold-Dipped Flamingo Necklace sold by DogEared
  7. Flamingo Designer Dies for papercrafting by Echo Park, available on Scrapbook.com
  8. Lina & Lily Lightweight Scarf sold on Amazon 
I hope you enjoyed our Flamingo Friday! Thanks for visiting and happy crafting!

Wednesday, July 22, 2015

A Beautiful Paper Bouquet


I adore the look of real flowers, but often three things hold me back from purchasing them...
  1. They're EXPENSIVE! The absolute only place that I'll even consider buying flowers at is our local Farmers Market. The vendors sell amazing bouquets at super affordable prices (like $6 for a massive arrangement).  Actually, that's where I got the flowers for my wedding - about $30 for the whole kit & caboodle! 
  2. I have a black thumb.  Yes, a BLACK thumb.  I tend to kill all the flowers or plants that I'm supposed to be nurturing. The fact that I'm both lazy and forgetful probably play a pivotal role. I always figure why buy something that's not going to last anyway.  Let's face it, even if I did take care of the darn things, flowers don't last longer than a week or so in the vase.
  3. My cats like to eat them.  I own three cats, two of whom are as naughty as can be. They are obsessed with flowers. They'll knock over the vase, spilling water all over.  They'll try to pull the flowers out so they can eat them. Needless to say that even when I get flowers, I have to display them up high and out of the way just so my cats don't attack them.
Which brings me to the reason for today's entry...why buy real flowers when you can create your own out of paper in any colors you want?!  I discovered today that Blitsy has some pretty cool tutorial videos on various projects and one of them is about how to make flowers out of paper! Check out the video below or click here to view it on Blitsy.


When you follow the link, you'll find additional links to all the items you need so that you can purchase them directly on Blitsy.  How cool is that?  Plus, on Blitsy, everything is ALWAYS on sale!

I personally haven't used the technique suggested by the video, but I have used these cool punches by EK Success!  These punches are super easy to use and all you have to do is punch and roll up the paper!  Below is another quick video on how to use these punches.


Blitsy has several of the punches in stock, including the Gerber Daisy, Carnation, and even one that looks like a Succulent!  There are others as well, simply search EK Success Dimensional Flower Punch on Blitsy to see them all!  And, don't forget, you can use a 40% off coupon code to save even more!  This is a project I'll definitely be trying my hand at!  Flowers that I don't need to water or worry about....that's what I need! We hope you've enjoyed this fun paper bouquet idea.  Be sure to check back often to see more posts about all things crafty.  Thanks for stopping and happy crafting!

Sunday, July 19, 2015

Sunday Funday!

I know that it's a bummer that the weekend is almost over, but you do have more new kit releases to look forward to this week!  :-) Be sure to check our Facebook page daily so you don't miss anything.  And to cheer you up a little bit, I wanted to share some scrapbook-themed funnies...
Source: Digital Scrapbooking HQ Blog
Not only cute, but also pretty much accurate! I think I know at least one crop buddy that fits into each category! Which one are you?  I'm probably a cross between the Nerd and the Fashionista.  The Fashionista in me wants EVERYTHING...papers, tools, stamps, storage!  And then the Nerd in me tries to organize it all.  It's sort of an inner battle - I'm never quite fully organized and I can't ever seem to have enough (there's always something NEW coming out that I "need").  Can anyone else relate?
Source: Unknown
This one makes me think of my progress at scrapbooking retreats. I tend to be kind of a perfectionist when it comes to making pages. Others are cranking them out and I'm still sitting there on Saturday night with 1 or 2 layouts complete.  I always have to remind myself it's not a race! For those times when I struggle with creativity, I use pocket scrapbooking or our kits - so fast & easy!!!

Want to see more? Be sure to visit our Pinterest page and check out our "Quotes We Love" and "Funnies" boards! And now for our Sunday Wrap-up.  Every Sunday we'll post the newest kits that were released this past week. Click the kit name to browse and order on our website.

New Kits - Week of July 12th - 18th
"Hawaii"
"Grandma's Love"
"Happy Birthday" (Disney)
"Disney Bound"

 Enjoy the rest of your weekend and happy crafting!


Friday, July 17, 2015

Your Next Weekend DIY Project!

Do you follow other Blogs? If so, which ones? I'm a HUGE fan of Elizabeth Kartchner's 'Dear Lizzy' blog.  She's always posting beautiful scrapbook and DIY projects that are totally do-able.  Plus, her family is completely adorable so I love to see pictures of them!  I also tend to visit various craft vendor blogs like Simple Stories, Basic Grey, Silhouette America, and Echo Park. These are just a few of my personal favorite companies. I love checking in because often that's where the info on the newest product lines is posted. You can also find lots of freebies, project how-to's and inspiration. Seriously, these are the next best thing to Pinterest! But lately I've also been checking in on the blogs of our affiliates, Scrapbook.com and Blitsy.  And today, Blitsy is featuring a super cute AND super easy DIY project!  This would be a fabulous way to glam up a teenage girl's room or bling out your scrap area.


All you need to complete this project are some blank canvases, acrylic paint & brushes, fabric Mod Podge and these cool GINORMOUS stickers! Check out the complete instructions on Blitsy's blog or watch this video for quick step-by-step instructions!

 
------------------------------------------------------------------------------------
I personally have several sets of these stickers and can vouch that they are amazing! What's not to like about huge stickers with fun quotes, bright colors, and glitter or foil accents?!   Do not miss your chance to get them at over $1.00 off per sheet from Blitsy this weekend! (Offer expires 07/19/15.)  

Need some more inspiration? Check out this MAMBI Blog post.  The author, Shelby, came up with creative ways to use the entire Jumbo Sticker sheet!  Here are pics of her creations, but see the details on each of the projects (18!) on their blog.

 I hope I've given you some fun ideas for easy do-it-yourself projects.  Not ready to get down to business? Use our Pin-It Hover button to pin them to one of your Pinterest boards for safe-keeping!
Thanks for visiting and Happy Crafting!!!


Thursday, July 16, 2015

Happily Ever After....

I hope you're taking some time today to check our Facebook page because we've been busy preparing some awesome Disney-inspired posts! Today we're sharing fun products, an online class, and even a brand new DML Disney pagekit. Pssst...we've also got an awesome board on Pinterest called Dreaming of Disney. :-) Check that out too!  Nevertheless, I wanted to share some "extra" ideas on the blog.

Sure, Mickey Mouse is a big part of your Disney-experience, but what about the Princesses?! Your little girl (or boy!) likely has a few favorites...Elsa, Cinderella, Ariel....and I'm sure meeting them is (or was) on your list of Disney to-do list. So, what to do with all those adorable pictures? Personally, I have a really difficult time with travel scrapbook pages; especially when it was more than a day-trip. The sheer number of photos can be overwhelming and then the thought of page upon page with a similar theme is intimidating too. My solution? "Mini-book" some of those moments!

I found this project in the Gallery on the Scrapbook.com webpage. (Be sure to check this page out when you have some free time.  Lots of fun ideas!)  What a fabulous idea to showcase your photos from Princess meet-and-greets.  And see what designer, Layle Koncar did?  She brought some of the cards with on her vacation and used them to capture autographs.  How perfect! Now those magical signatures can be part of the album!

 In case it's hard to tell from the photos, this album is a 4x6 binder style by We R Memory Keepers.  You can purchase it from Scrapbook.com in a variety of colors and it includes 12 pocket pages! Don't worry....you can get extra page protectors for this album too! But, seriously, how cute is this mini photo/autograph book? It's the perfect size for your little princess or prince to tote around and show off to friends and family! And the best part? The whole thing is made using one scrapbook collection so everything matches and you can put it together in an afternoon - yay!

This collection is called "Enchanted" by Simple Stories.  We love their stuff!  Every line they create is adorable, made to mix-n-match, affordable, and designed to make things easier for YOU!  Right now, the collection is available on Blitsy at a great deal!  Cardstock stickers, papers, wood veneer pieces, washi tape, and MORE!  Here's a little sampling for you...

 
(FYI-the items are only available for 4 more days on Blitsy.  The site runs amazing sales, but for a limited time. Products come & go frequently!)  You can also find everything you need here. And Scrapbook.com offers an even-easier 12x12 kit, complete with layout ideas!  

I also wanted to let you know that if you love this idea, but the thought of creating it from scratch seems daunting, simply sign up for the album class!  Yep, Scrapbook.com offers lots of fun classes, many of them FREE!  Right now you can sign up for the Simple Stories Enchanted Mini Album class for absolutely free.  Awesome! I hope you've enjoyed seeing this fun project.

Don't forget! We also have lots of fun page kits available on our website.  Check out this Princess kit available now.  More Disney kits available too - use the search bar or click "Disney" on the left-side theme bar.

Thanks for stopping by and happy crafting!

Tuesday, July 14, 2015

Our Blog is BACK!!!

It's time to welcome us back to the blogging scene!  We're so excited to share lots of fun stuff with you.  From our newest pagekits to easy DIY projects, from reviews on crafting tools to scrapbooking tips & tricks...we look forward to being one of your favorite resources!

This week is all about introducing you to our new social media profiles.  I'm sure you've noticed our Facebook activity in the last couple weeks.  We've been sharing our favorite new products and tools from Scrapbook.com and Blitsy.  Scrapbook.com is an amazing online outlet for all your supply and tool favorites along with the newest releases!  Be sure to check out their Gallery for inspiration. Search by theme, product, project type and more!  Or visit their Classes page for lots of FREE online classes.  You can't get better than FREE!!!  Want to save up to 70% off on your craft supplies?  Be sure to check out Blitsy.  You can even use 40% off coupon from other big box stores!  Check the site daily because sales only last a few days and then the products are gone.
Have you visited our Pinterest page lately? You should! We've been updating and adding to our boards to provide you with exciting content and useful craft info.  Click that "Follow Us" button to see our pins in your feed.

We're also super excited to announce our brand new VIP e-mail list!  Click here to sign up now! You'll want to get on this list; it's the only way you'll receive our exclusive coupons and sale info along with occasional craft content and Down Memory Lane news.  Be in-the-know! And when you sign up, you receive a code for a FREE* pagekit with your next purchase!  (*Free kit with your next purchase of one or more kits.)

Stay tuned for most posts this week but, for now, here are our newest page kits.  Visit our webpage to see all our kits!
"Beach Bum"
"Happy 5th Birthday"
"Land That I Love" 
"Pool Time"
"Ultra Special Moments"
"Water Park Fun"
We would love to hear from YOU about the type of content you'd like to see. Comment here with your ideas!

  • Products/Tools you'd like us to review
  • How-to videos or photo tutorials on techniques
  • Themes you'd like to see

Thanks for following our blog and happy crafting!